Windows Installation
This guide is to take you through the installation process for lmadmin.
FlexNet Publisher lmadmin Download Links
The latest version of lmadmin can be download here: Download lmadmin
This link will take you to the revenera website where you can download installers and zips for Windows, Linux and macOS.
Installation Notes
To use lmadmin on Windows platforms, the relevant Microsoft Visual C++ Redistributable Package must be installed. You have an option to install this package during the lmadmin installer process.
The lmadmin installer requires that JRE 11 or later (for OS X: JRE 11 or later) be installed. If the JRE is not already present on the machine, it must be installed separately, because it is not bundled with the lmadmin installer.
The JDK 17.0.8, JDK 11.0.20, and OpenJDK 20.0.2 are tested Java Standard Edition systems for installing the lmadmin.
- https://www.oracle.com/java/technologies/javase/jdk17-archive-downloads.html
Do not run the 32-bit lmadmin and the 64-bit lmadmin on the same system. If you are upgrading from the 32-bit lmadmin to the 64-bit lmadmin, you must stop and deinstall the 32-bit lmadmin first.
Installation Steps
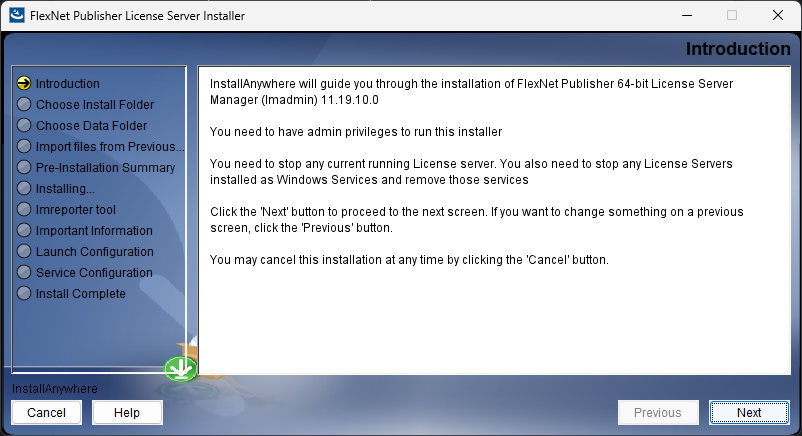
This is the starting screen of the installation wizard. It provides initial guidance before any files are copied or settings are changed.
Key Information Displayed:
-
Reminds you to stop any currently running FlexNet license servers and any FlexNet License Servers installed as Windows services before continuing.
-
Advises that you can click Previous on later screens to change settings, or cancel the installation at any time.
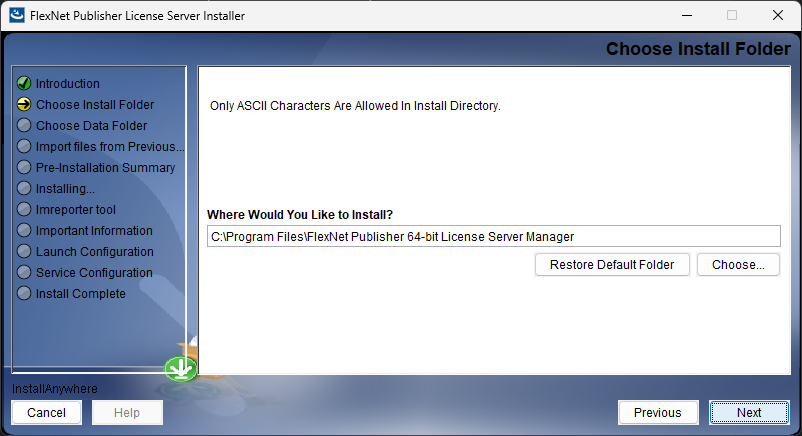
This step determines exactly where the license server manager files will be installed on your local machine.
Customizations Available:
-
Choose...: Opens a file browser allowing you to select a custom directory path instead of the default location.
-
Restore Default Folder: Quickly resets the installation path back to the system default if you change your mind.
Key Information Required / Constraints:
-
ASCII Characters Only: The install directory path must only contain standard ASCII characters.
-
Default Path: Automatically targets C:\Program Files\FlexNet Publisher 64-bit License Server Manager unless modified.
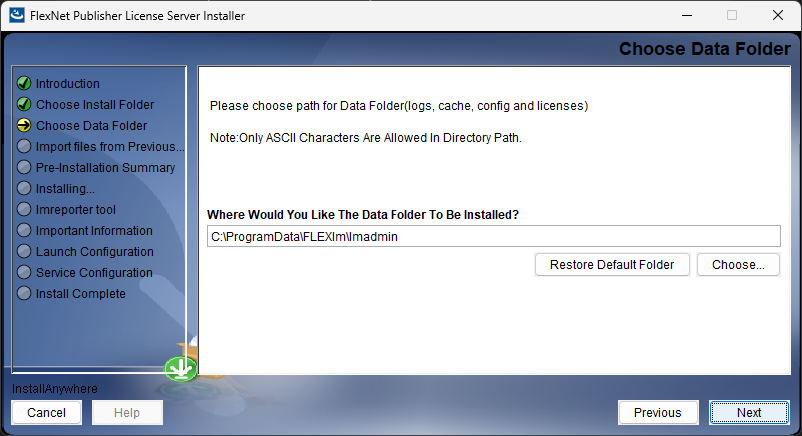
This step defines where the application data, configuration files, and log files generated by the license server manager will be stored.
Customizations Available:
-
Choose...: Lets you browse and select a custom folder path on your system to store your server data.
-
Restore Default Folder: Instantly reverts the path back to the standard installation default.
Key Information Required / Constraints:
-
ASCII Characters Only: The directory path must contain only standard ASCII characters.
-
Default Path: By default, it targets the data subdirectory within the main program installation location.
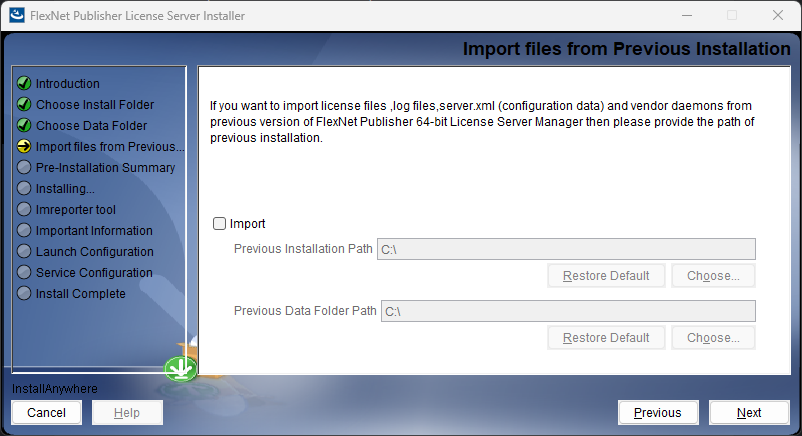
This step allows you to carry over configuration details if you are upgrading or reinstalling the server manager.
Customizations Available: You can check the Import box to pull in license files, log files, configuration data (server.xml), and vendor daemons from an existing installation.
Key Information Required: If you choose to import, you must provide the specific file paths for both the Previous Installation Path and the Previous Data Folder Path.
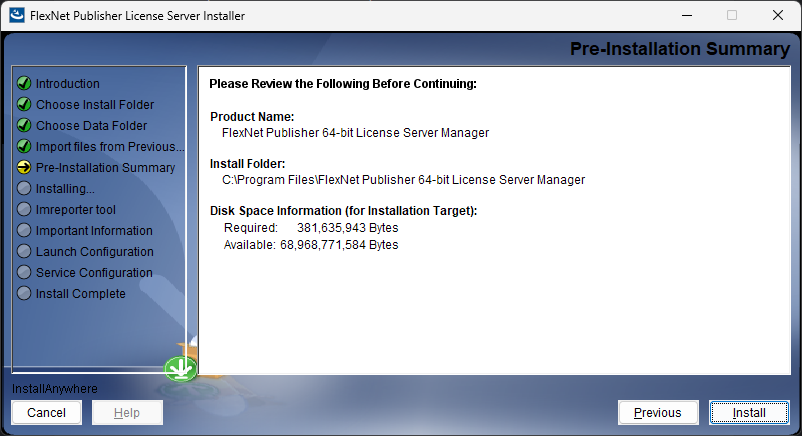
This screen serves as a final review checkpoint before the installer begins modifying your system.
Customizations Available: No changes can be made on this screen. If any information is incorrect, you must click Previous to go back and modify your settings.
Key Information Displayed:
-
Product Name: Confirms you are installing the FlexNet Publisher 64-bit License Server Manager.
-
Install Folder: Displays the targeted directory (defaulting to C:\Program Files\FlexNet Publisher 64-bit License Server Manager).
-
Disk Space Information: Shows exactly how much space is required for the installation versus how much space is currently available on your target drive.
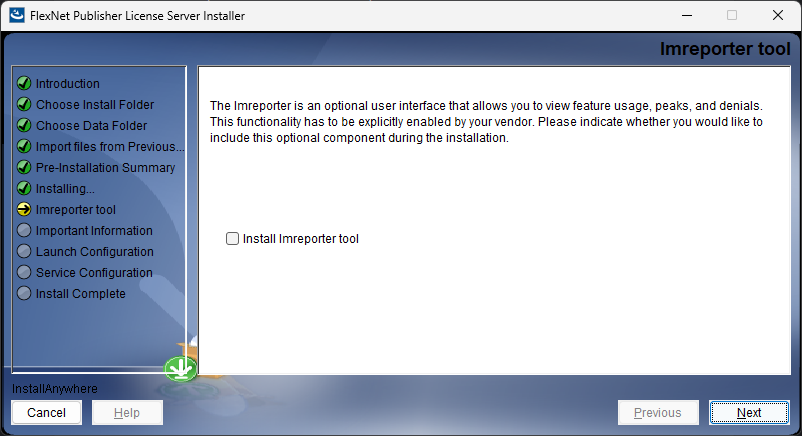
This step configures an optional monitoring utility during the installation process.
Customizations Available:
- Install lmreporter tool (Checkbox): You can check or uncheck this box to choose whether to include this component in your installation.
Key Information Displayed:
-
Purpose: The lmreporter is an optional user interface that allows you to monitor feature usage, peak usage times, and license denials.
-
Vendor Requirement: Note that this functionality must be explicitly enabled by your software vendor to work.
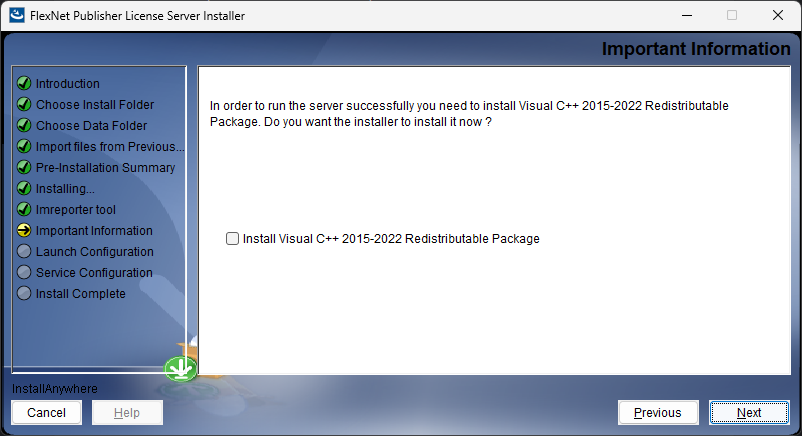
This step checks for foundational system dependencies required to run the license server components properly on Windows.
Customizations Available: None. The wizard automatically detects the required runtime components.
Key Information Displayed:
-
Displays the prerequisite package status (typically validating or preparing to install the Microsoft Visual C++ Redistributable package if it isn't already present on the system).
-
If you already have the appropriate Microsoft Visual C++ Installed it will not make any changes.
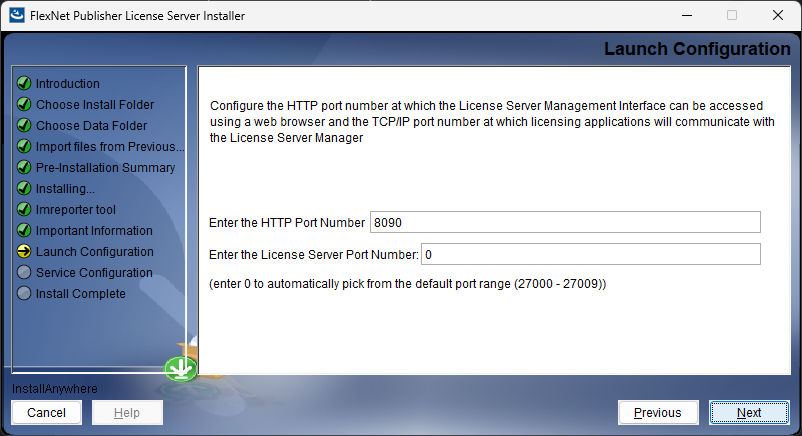
This step establishes the networking rules and port assignments so that client machines can successfully communicate with the license server.
Customizations Available:
-
HTTP Port Number: Allows you to input a custom port (defaulting to 8090) to access the web-based License Server Management Interface.
-
License Server Port Number: Allows you to specify a dedicated TCP/IP port for license communication.
Key Information Required / Constraints:
- If you enter 0 for the License Server Port Number, the system will automatically assign a port from the standard default range (27000 to 27009).
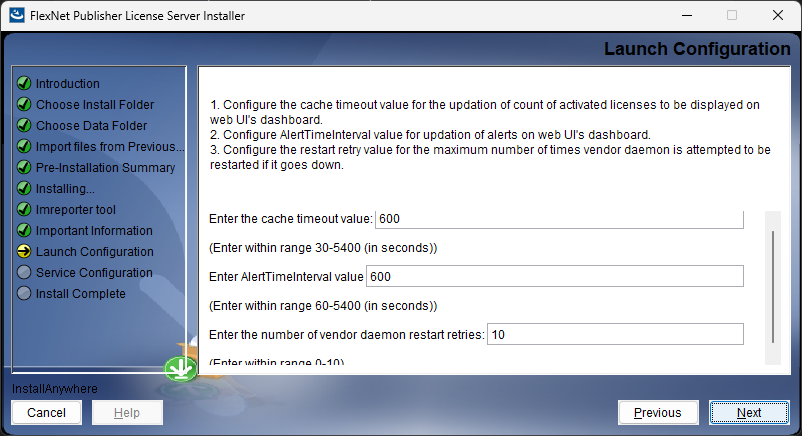
This step optimizes how data and dashboard alerts are refreshed within the management interface.
Customizations Available:
-
Cache Timeout Value: Let's you define how often the count of activated licenses updates on the web UI dashboard.
-
AlertTimeInterval Value: Let's you configure the update interval for dashboard alerts.
-
Restart Retry Value: Sets the maximum number of times the system will attempt to restart the vendor daemon if it unexpectedly goes down.
Key Information Required / Constraints:
- The cache timeout value defaults to 600 seconds and must fall within the permitted range of 30 to 5400 seconds.
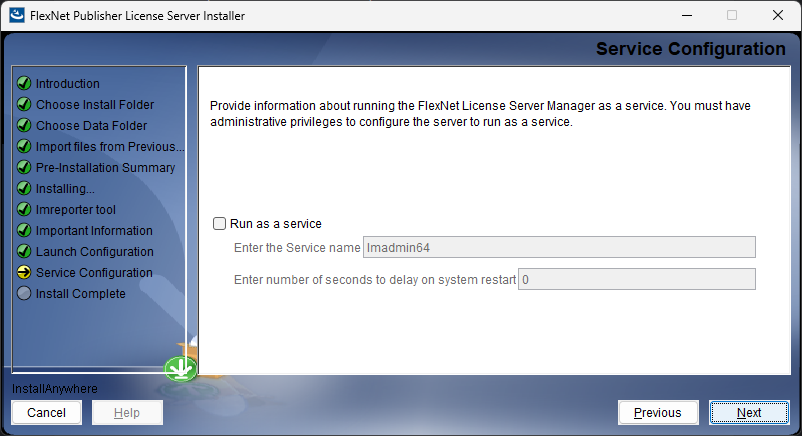
This step configures how the license server manager runs as a background process on your Windows operating system.
Customizations Available:
-
Run as a Windows Service (Checkbox): Allows you to choose whether the license manager automatically boots and runs in the background as a system service.
-
Service Name: If running as a service, you can input a custom name to identify it within the Windows Services manager (default is typically lmadmin).
Key Information Required / Constraints:
- Running the software as a service is highly recommended for server environments, as it ensures the license manager starts automatically when the computer boots up, even if no user is logged into the machine.